Quality without compromise
QUALITY CONTROL
The quality control department monitors the entire production process, starting with the input of raw materials, until the delivery of the final products. We have laboratories and machines capable of doing all the tests requested by the specific procedures as well as the client's requirements. We also have collaborations with qualified external laboratories.
Process control


To guarantee a certain quality level, we control every phase of the production process to ensure that the related procedures are followed. From the tests done in Saturn, we mention the followings:
Input control. All inputs are checked according to internal specifications (sand, chemicals, paints, resins, etc.) using the appropriate laboratory equipment.
Sand and the forming mixture quality control. The sand granulation as well as the mechanical characteristics of the forming mixture for each mixer are checked daily, with appropriate devices.
Cast iron processing control. Before pouring the cast iron into the molds, the following checks are made:
Thermal analysis of liquid cast iron. With the help of software, the nodulation process is controlled and information is received upon the quality of the metal in the pouring ladle, before casting and then, through the necessary corrections, the required quality of cast iron, at the moment of casting, is reached. The result of the final analysis is entered into the database.
Cast iron chemical composition. Before casting the part, each batch is checked using:
- ARL spectrometer
- Columbus spectrometer
- ELTRA %C & %S analyzer
The resulting values are entered into the database.
The temperature control of the liquid cast iron is done with the HERAEUS immersion device.
Cast iron mechanical characteristics control. For each batch, samples are cast to check the tensile strength, cast iron elongation and the KCU resilience, using the following infrastructure:
- GALDABINI 20 kN traction machine with extensometer
- Fritz Heckert 40 kN traction machine
- Charpy impact machine
Control of the casting process, casting forms, and casting assembly. The tack of the refractory paint is checked daily, using the Ford cup, as well as the thickness of the paint layer deposited on the forms and cores.
The temperature control for the surface of the part is done before the knock-out, with the help of a contact thermometer inserted in the mold until it touches the hot part.
Castings control


An internal final check is performed according to standard procedures and specific procedures as a result of the client's requirements:
Direct visual control. The surface quality is carefully checked, looking for possible superficial defects.
Dye Penetrant Control. Is performed to detect possible cracks and discontinuities.
Ultrasonic control. The NAMICON device is used with probes of different frequencies and various geometries of the contact surface.
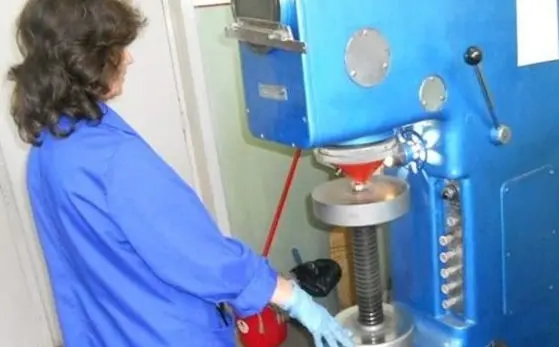
Hardness control. The hardness control is done on the surfaces required in the customer's documentation, using the following devices:
- Laboratory hardness tester Brinell 3000 Kg for hardness control on samples attached to the casting
- Portable hardness tester ERNST for hardness control on the part
- Dynamic Portable Durometer - Type G Probe
Micrographic control. The analysis of the metallographic structure is carried out with the help of the Olimpus optical microscope. Beforehand, the samples are polished on special grinding machines.
Dimensional control. It is performed by protracting on the laying-out table using classic tools such as drawing calipers of various sizes.
Painting control. In the painting process, the characteristics of the paints are determined by:
- Ford cup - for tack control
- Digital tester to control paint layer thickness
- Digital thermometers
Database.
All process control and castings control parameters are introduced into a very detailed database.
Each piece is marked with the foundry logo, casting series and the manufacturing year. In this way we have a rigorous traceability of each item.


